
Skipping the database with stateless tokens: a hidden Rails gem and a useful Web technique
Introduction
Recently I’ve been building a Ruby on Rails web app that needs to allow users to create accounts without passwords, and log in just by clicking a link sent to their email. Commonly referred to as “passwordless” login using “magic links.”
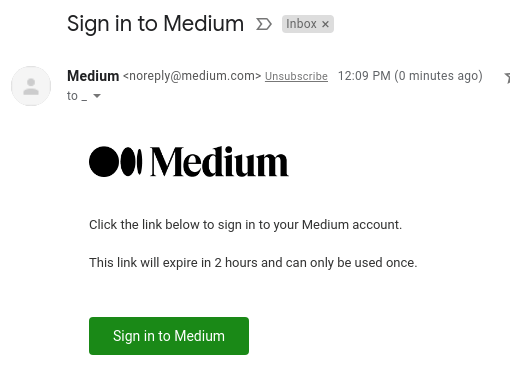
As an example, it’s how Medium does their sign up and login:
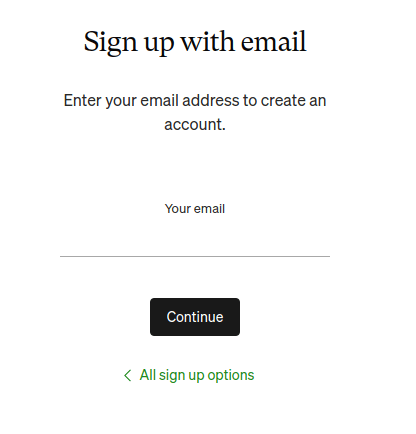
The sign up and login pages send emails with magic links that sign you in when clicked:
Surveying the landscape
I had to do this one other time, and had used a Ruby gem that offered the basic functionality, but it had some annoying rough edges and didn’t integrate with the most popular and battle-tested Rails user authentication solution, Devise, so was missing a lot of typical user management functionality.
Re-surveying the landscape this time, I didn’t see anything new on the radar, just a bunch of articles1 explaining how easy it is to roll your own solution to this problem. Most of them take the approach of solving the problem this way (simplified):
-
Alter the
userstable to add atokencolumn.2 Something like this:ALTER TABLE users ADD COLUMN token TEXT NOT NULL DEFAULT uuid_generate_v4()::text; CREATE UNIQUE INDEX index_users_on_token ON users USING btree (token); -
When a user requests to log in, generate a long random value and store it in the token column:3
 user # => #<User id: 123, email: "[email protected]", ... >
 token = SecureRandom.hex(42) # 1ed67ea911b8bd2937e84a91be126b468d1d1229cd
 user.update(token: token) # UPDATE users SET token = '1ed67ea911b8bd2937e84a91be126b468d1d1229cd' WHERE id = 123;
Then email the user a link containing this token value (the “magic link” ✨). The magic link basically looks like this:
https://example.com/login?token=1ed67ea911b8bd2937e84a91be126b468d1d1229cd -
Respond to incoming magic links by grabbing the token value and doing a basic equality lookup on the users table using the provided value - basically this in SQL:
 SELECT user_id
 FROM users
 WHERE token = ? /* '1ed67ea911b8bd2937e84a91be126b468d1d1229cd' */
 LIMIT 1;
See anything wrong with that general approach?
From my estimation, this technique is vulnerable to a timing attack given the way it does naive comparisons of plaintext token values, which are essentially passwords.
In short, token values can be guessed through careful brute forcing by measuring variations in response times. Like playing a game of Hide The Thimble with the web server, which responds “warmer” via a longer response time when you get one char closer to a valid token value.
A safer approach
A cheap and easy mitigation to this timing attack could be invalidating our tokens after a short window of time, and rate limiting requests to prevent brute forcing from being viable. I wonder how effective that would remain for a popular site with a lot of live data however.
The proper way to avoid a timing attack is to make the computation time of a function not vary dependent on the input.
That means when doing equality comparisons between values, you can’t naively return early when you find the first character/byte that doesn’t match the expected value. Which is what is happening when you do a naive SQL WHERE = on a btree index or a simple == comparison in most programming languages.
In Ruby-land, Rack::Utils.secure_compare provides a solution that does comparison of fixed-length strings in constant time by always comparing every byte between two strings. Rails improves this with its own ActiveSupport::SecurityUtils.secure_compare which can compare strings of mismatched length by comparing the hash of both inputs.4
So one approach to fixing our previous algorithm would be to do the SELECT lookup using the user’s email address, then doing the token comparison in memory in Ruby using one of these constant-time secure comparison functions.
With this approach, we’d add the user’s ID to our magic links:
https://example.com/login?user_id=123&token=1ed67ea911b8bd2937e84a91be126b468d1d1229cdand the SQL would simply look up the user like
SELECT *
FROM users
WHERE id = ?; /* 123 */
Loading that data into Ruby as a user object, we’d now do our constant-time comparison with the provided URL parameter like so:
if ActiveSupport::SecurityUtils.secure_compare(user.token, params[:token])
  # successfully authenticated
else
  # failed to authenticate
end
A safer, database-less approach
Even with the fix, I still find this approach unsatisfying. It involves a whole lot of state management, and we still need to add expiration and collision handling to our implementation which will complicate it further.
Luckily there’s a different method that avoids the overhead of state management: we could digitally sign with an HMAC, or encrypt and sign5 a simple blob of data using a symmetric key that identifies our user into a URL-safe representation, and use that as our token.
These cryptographic functions are not susceptible to timing attacks when we decrypt and verify signatures, and the other benefit is that we don’t have to store anything in our database.
In fact, this is how Rails’s default session store works - the cookies given to clients are encrypted data which the web server decrypts on each request!
Even better, Rails provides handy classes that let us do this on our own - MessageEncryptor (encryption and signing) and MessageVerifier (HMAC digital signing).
MessageEncryptor and MessageVerifier
Here’s an example of encrypting a little blob of data, {user_id: 123}, using MessageEncryptor:
secret = Rails.application.secrets.secret_key_base
key = ActiveSupport::KeyGenerator.new(secret).generate_key(
  "salt",
  ActiveSupport::MessageEncryptor.key_len,
)
encryptor = ActiveSupport::MessageEncryptor.new(key, serializer: JSON)
encrypted_data = encryptor.encrypt_and_sign({user_id: 123})
# => "OLOMT43EAQfxsH87LxYr--vh9QbmdfZW51KtyW--u+sW6kl2AtUOMhDBZaBNgA=="
And here’s an example signing that same data with an HMAC using MessageVerifier:
verifier = ActiveSupport::MessageVerifier.new(key, serializer: JSON)
signed_data = verifier.generate({user_id: 123})
# => "eyJ1c2VyX2lkIjoxMjN9--007e4752e9c8a174b05fb759c83de34883b81984"
Comparing the two outputs, they are both of similar length - 64 chars and 62 chars, respectively. For comparison, the text representation of a version 4 UUID is 36 chars.
However, if you put the data through a Base64 decoder, for the encrypted data (ciphertext) created with MessageEncryptor you will get total jibberish binary:6

Whereas the signed data created with MessageVerifier is visible:
{"user_id":123}4;gsƵ<7o}
The gibberish appended to the end is our digital signature which verifies that we created the data.
When testing using larger input data (plaintext), I find that the encrypted and signed data lengths remain really close still. For that reason, I default to encrypting data using MessageEncryptor unless I explicitly want the receiver to be able to see the transformed data, at which point I use MessageVerifier.
To turn the ciphertext back into plaintext, for MessageEncryptor we do this:
encryptor.decrypt_and_verify(encrypted_data)
# => {"user_id"=>123}
encryptor.decrypt_and_verify("garbage data")
# => ActiveSupport::MessageEncryptor::InvalidMessage
And for MessageVerifier we do this:
verifier.verify(signed_data)
# => {"user_id"=>123}
verifier.verify("garbage data")
# => ActiveSupport::MessageVerifier::InvalidSignature
If you noticed, we re-used our Rails application’s secret_key_base when setting up.7
What do you think will happen if we set up an encryptor with a different secret key and try to decode our ciphertext?
secret2 = SecureRandom.hex(64)
key2 = ActiveSupport::KeyGenerator.new(secret2).generate_key(
  "salt",
  ActiveSupport::MessageEncryptor.key_len,
)
encryptor2 = ActiveSupport::MessageEncryptor.new(key2, serializer: JSON)
encryptor2.decrypt_and_verify(encrypted_data)
# => ActiveSupport::MessageEncryptor::InvalidMessage
As expected, the decryption fails.
Therefore, if you want to invalidate all encrypted / signed messages, you can switch to a new key. Which by the way is why if you change your Rails’s secret_key_base, your logged-in users will have to log in again (if you’re using the default session store).
Hopefully that gives you a taste of how these tools work. Bringing it all back to the beginning of the post, we can now use our encrypted data (ciphertext) as the token in our magic links:
https://example.com/login?token=OLOMT43EAQfxsH87LxYr--vh9QbmdfZW51KtyW--u+sW6kl2AtUOMhDBZaBNgA==And our LoginController will simply decode the encrypted token, with no database needed for token validation. Magic! ✨
devise-passwordless gem
I went ahead and integrated this solution into Devise as an authentication strategy via a new gem, devise-passwordless. If you use Devise check it out and let me know what you think!
Interestingly it ended up not being very many lines of code thanks to how Devise uses Warden strategies under the covers. Most of the complexity came about because the magic link CRUD actions don’t fit neatly into Devise’s SessionsController’s actions.
Other uses for stateless tokens
The fun doesn’t need to end at passwordless login solutions. I’ve found a lot of other use cases for stateless tokens. Here are some examples:
API authentication bearer tokens
Rails nowadays is pretty good at building API solutions for things like mobile apps. But API authentication uses bearer tokens, not cookies. So how do we provide that?
A popular solution is to use JSON Web Tokens (JWT) to encode the user’s identifying info into tokens basically exactly as we did in the code examples with MessageEncryptor.
However, there are strong reasons to not use JWT, which I’ll cover in a later section. Instead, I recommend using our familiar MessageEncryptor approach for bearer tokens:
curl -H 'Accept: application/json' -H "Authorization: Bearer OLOMT43EAQfxsH87LxYr--vh9QbmdfZW51KtyW--u+sW6kl2AtUOMhDBZaBNgA==" https://example.com/foo
Email unsubscribe links
When sending automated emails, for a better user experience (UX) as well as legal compliance it’s a good practice to implement single-click unsubscribe links, where clicking “unsubscribe” at the bottom of every email takes users to a page that lets them edit their notification settings.
It would be poor UX to require users to log in to their account to edit these settings - they may have clicked the link from their phone, or maybe they forgot their login but still don’t want to be contacted any more.
So what I do is generate constrained bearer tokens for the user (using either the purpose option of MessageEncryptor or just use an entirely separate key) which allow the bearer of that token to only edit notification settings for that user (not full user access).
Then, modify the user notification preferences page to work outside of the “user is fully cookie-authenticated” segregated area by accepting our bearer token, and now we can send links to this page in our emails with our generated bearer tokens:
https://example.com/settings/notification_preferences?token=OLOMT43EAQfxsH87LxYr--vh9QbmdfZW51KtyW--u+sW6kl2AtUOMhDBZaBNgA==Works great!
In fact this use case is even obliquely mentioned in the MessageVerifier docs as “auto-unsubscribe links where the session store isn’t suitable or available.”
It’s important that the bearer tokens be constrained so that if a user forwards an email to someone else, that person doesn’t get full access to their account via the unsubscribe link.
Out-of-band phone camera uploads
Have you ever started filling out a long application for some Serious Business on your desktop computer browser, and get to a section where it asks you to upload a picture of your driver’s license, only to present you with a simple file upload input like this?
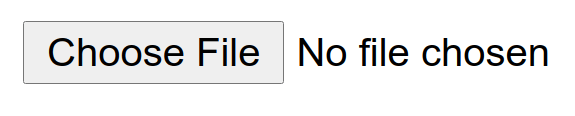
Did you groan as you started contemplating how you’re going to get the picture from your phone to your desktop computer (use iCloud? ShareDrop? Dropbox? Email yourself?)?
A pattern I’m encountering more often lately in these scenarios is the website instead offering to send an SMS message to your phone or scan a QR code which takes the phone to a special page that will upload camera pictures directly to the page you have open on your desktop browser. Genius! And I’m sure a huge boost in conversion rates.
For example, when I was curious about how much I’ve paid into Social Security taxes over my lifetime, the Social Security website texted a link to my phone to take a picture of my driver’s license:
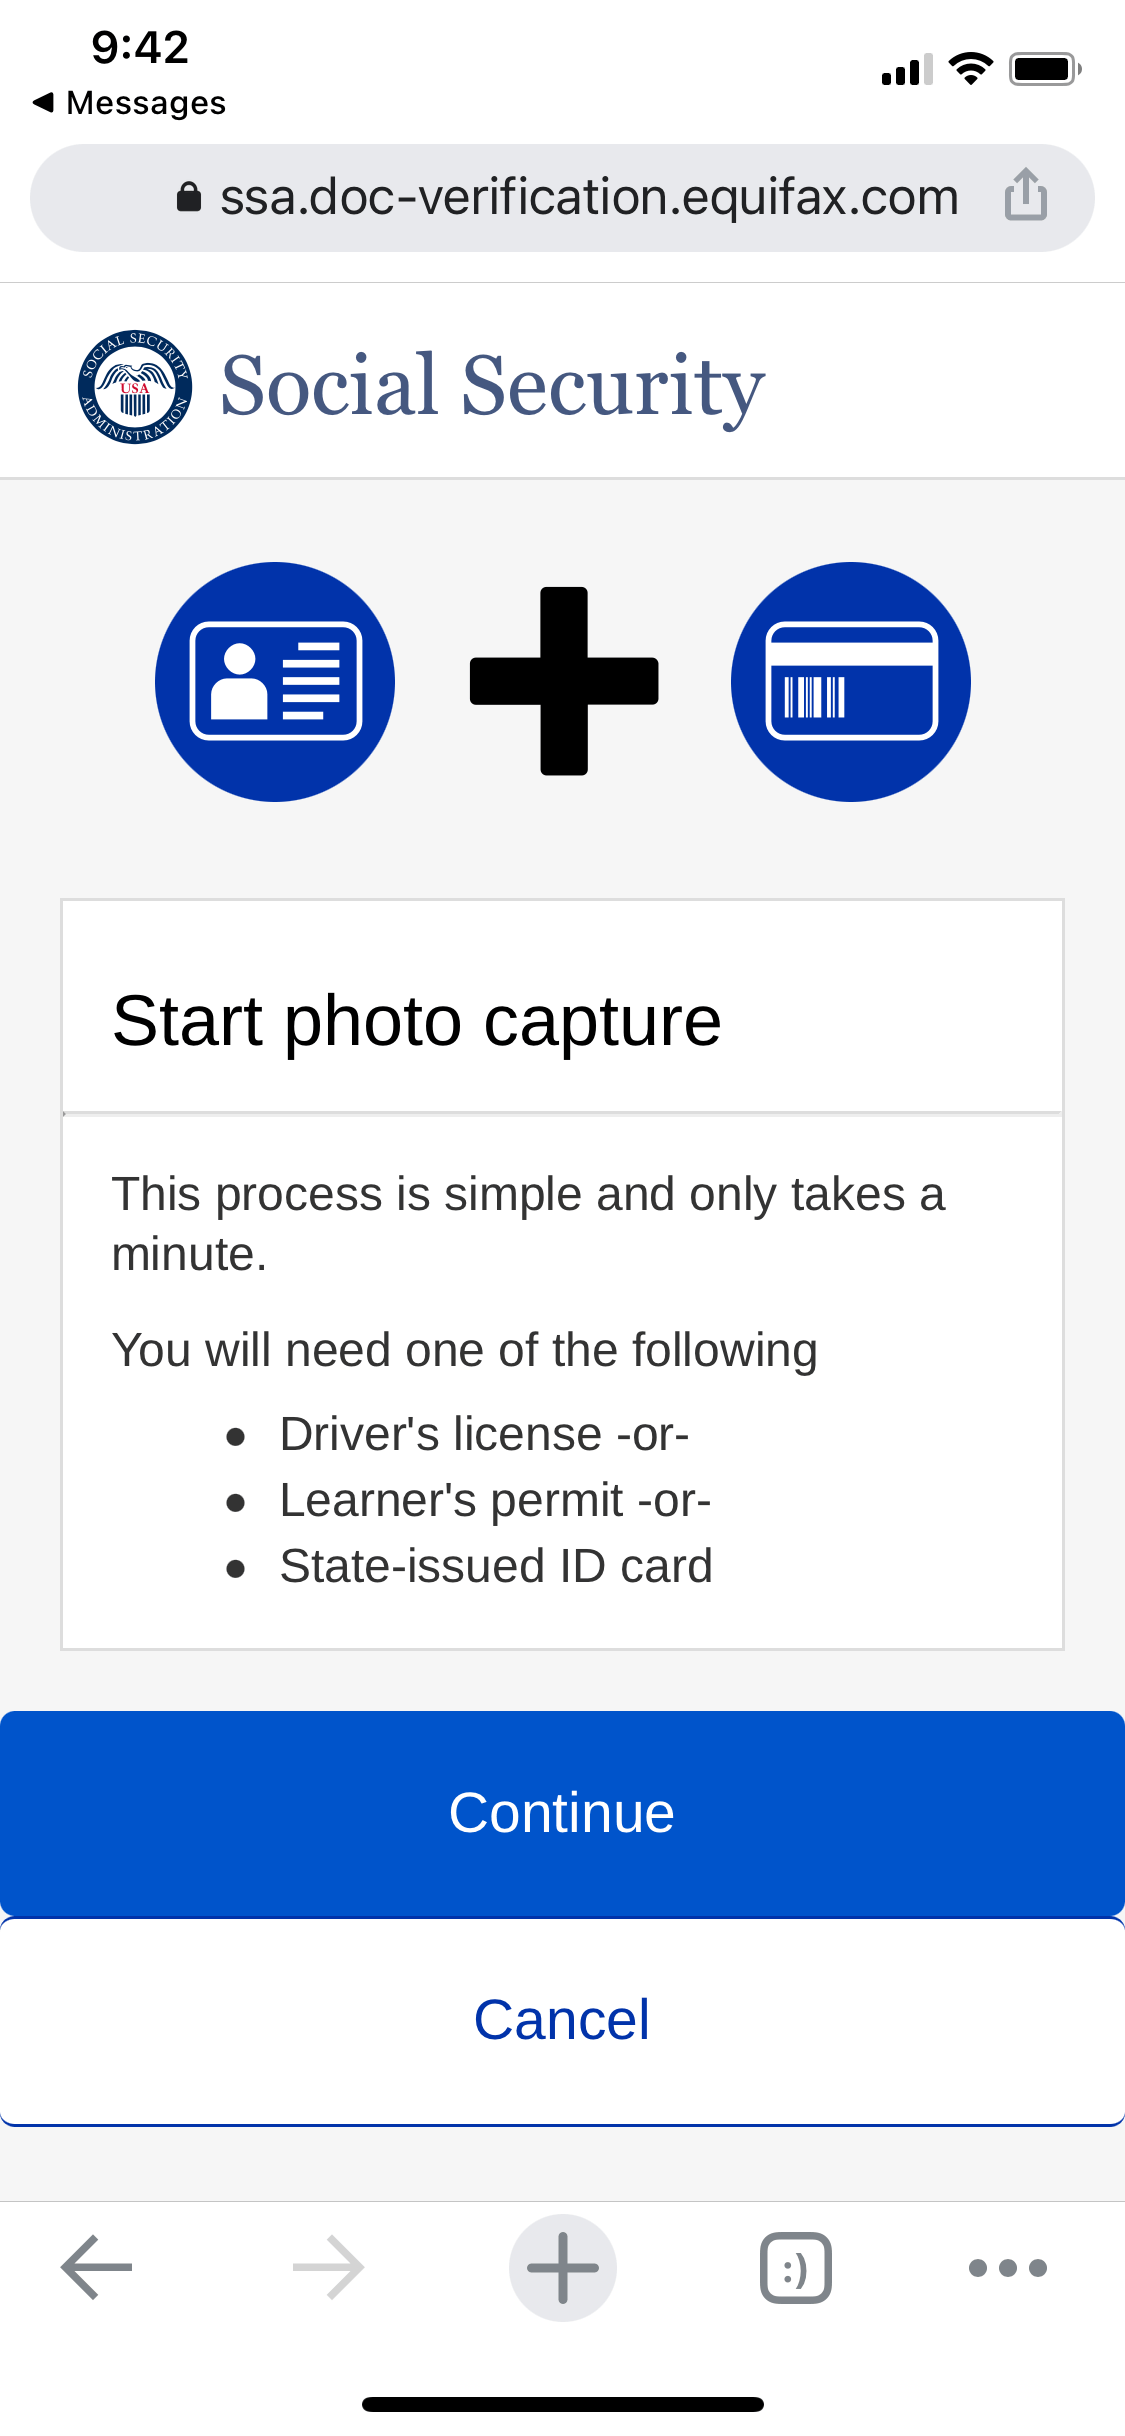
As you may imagine, we can easily implement this ourselves using our good friend, stateless tokens.
Basically, this is the same approach as the constrained bearer tokens in the email unsubscribe section. However instead of sending users to a notification settings page, we’re sending them to a document upload page (with HTML media capture attributes that make using the phone camera easy), and constraining our tokens to only allow document upload permission.
Then, we can either encode the link using a QR code, or send it via SMS message to the user’s phone. Simple!
Proxied 3rd party API responses
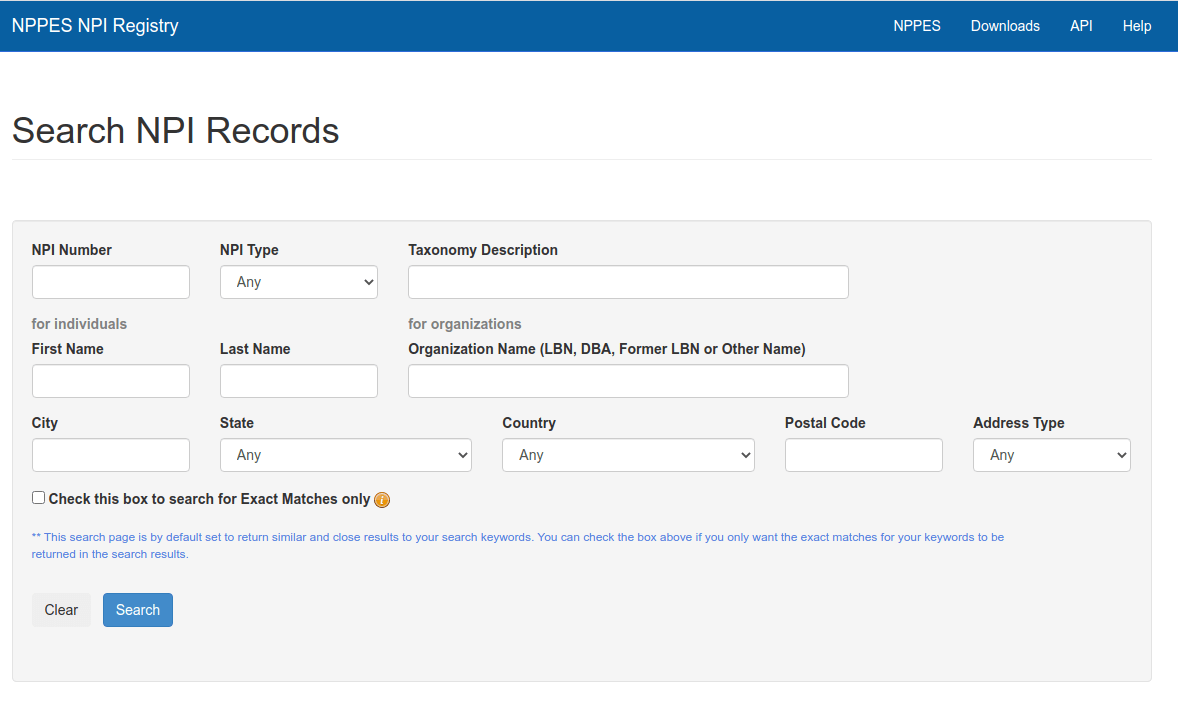
Another scenario I’ve found tokens useful is when a website I was building had to make use of a 3rd-party API. In this case, we had to verify users are healthcare providers. In America, every provider is issued a National Provider Identifier (NPI) number, and the federal government helpfully provides an API for searching this database.
So to verify a user we’d have a two-step process:
- Search NPI API, present returned NPI record data to the user
- Ask user to verify phone ownership by sending an SMS or voice call to a phone number on their NPI record
On completion of Step #2 the NPI record and phone ownership would be attached to the user in one go. Users should be able to repeat Step 1 over in case they fat-fingered their NPI number.
Now the problem is, how do you store the data from Step 1 in a temporary yet tamper-proof way?
The naive way would be to stick some JavaScript on the page that queries the 3rd-party NPI API directly. The danger with that approach is that a user could modify the returned data using their browser before submitting Step 2.
Therefore to validate the NPI record’s validity at the end of Step 2, you’d have to repeat the query from your backend and ensure the phone number data matches what the user claimed. If the NPI API is temporarily unavailable you’d have to (annoyingly) add messaging to the user they need to try again later. Bad UX, and not very clever! 👎
So if the backend has to query the API anyway, we might as well proxy all requests through it, that way we can avoid the occasional outage responses by either caching the calls or saving results in our database. Right? Well, now you have the annoyance of dealing with either cache invalidation, or managing temporary state in our database which we’ve already described at the outset of this article to be less than ideal.
The solution is pretty simple: when proxying the 3rd party NPI API response through our own backend API, we sign the response using MessageVerifier. Now we have stateless, readable response data, as well as a secure “chain of custody” that ensures the NPI data came from our API! 🥳🎉
Comparison with JWT
As mentioned earlier, JWT is a tool mainly popular for API token authentication, but a lot of people saw more general possibilities with it. Myself included, which is why I wrote an article about it in 2014 when I was still starry-eyed about it.
There are serious problems with JWT, however, and they’re much better described by tptacek, popular security expert on Hacker News, than me. Here’s what he had to say about JWT in 2017:
The issue with JWT in particular is that it doesn’t bring anything to the table, but comes with a whole lot of terrifying complexity. Worse, you as a developer won’t see that complexity: JWT looks like a simple token with a magic cryptographically-protected bag-of-attributes interface. The problems are all behind the scenes.
For most applications, the technical problems JWT solves are not especially complicated. Parseable bearer tokens are something Rails has been able to generate for close to a decade using ActiveSupport::MessageEncryptor. AS::ME is substantially safer than JWT, but people are swapping it out of applications in favor of JWT.
Someone needs to write the blog post about how to provide bag-of-attributes secure bearer tokens in all the major programming environments. Someone else needs to get to work standardizing one of those formats as an alternative to JWT so that there’s a simple answer to “if not JWT then what?” that rebuts the (I think sort of silly) presumption that whatever an app uses needs to be RFC standardized.
But there’s a reason crypto people hate the JWT/JOSE/JWE standards. You should avoid them. They’re in the news again because someone noticed that one of the public key constructions (ECDHE-ES) is terribly insecure. I think it’s literally the case that no cryptographer bothered to point this out before because they all assumed people knew JWT was a tire fire.
For the example use cases I’ve given in this article, there’s really no need to support dynamic algorithm selection of JWT or any of its other features - our web server can use a preselected, symmetric shared-key algorithm via MessageEncryptor we’ve described in this article to implement the “bag-of-attributes secure bearer tokens” described by tptacek. Thereby avoiding the multiple severe vulnerabilities that have come out of JWT in the past and who knows what in the future.
Drawbacks
There are of course some disadvantages to stateless tokens that should be considered.
For one, the token length is a bit longer than if you’re generating stateful tokens. This doesn’t bother me too much, although it is annoying when you’re sticking links in a QR code and you have to use one of the more complex codes to fit the whole link in.
A bigger one is token revocation. For one, you don’t even know how many tokens you have out there like you do with stateful tokens. And you can’t invalidate specific tokens by just deleting a row in a database.
Probably the simplest workaround I’ve found for stateless tokens is to add a created_at timestamp to my tokens, and consider all tokens created before a given revocation time to be invalid. This is what I do in my devise-passwordless gem if users want to expire their old tokens on successful logins (see passwordless_expire_old_tokens_on_sign_in config option).
Otherwise, the nuclear option is to roll the secret key, which will invalidate all existing tokens.
Deeper dive
If you want to understand how these work at a deeper level by reading the source code, I recommend this series of blog articles.
Once you get comfortable with MessageEncryptor and start using it in your projects, you will probably want to abstract away some of the repeated work you do into a porcelein class. Here’s what mine typically looks like from my devise-passwordless gem; it handles salts, sets and checks token expiration, and makes the token error handling simpler.
Disclaimer
I’m not a security person and I could be wrong about things I wrote in this post. If I am, please let me know.
-
Examples here, here, here (source code), here ↩
-
Other approaches create a whole separate
tokenstable ↩ -
Rails 5 actually added a built-in ActiveRecord helper has_secure_token which does some of this work, although it’s hardcoded to 24 chars using base 58. ↩
-
Devise also has its own
secure_compare↩ -
Encryption alone being potentially insufficient due to padding oracle attacks ↩
-
Fun fact, the control characters in this output completely broke my blog’s Atom feed syndication! It turns out XML 1.0 simply cannot process control characters. Not “please escape control characters,” it makes them outright illegal! And since Atom is built on XML 1.0, there is no way to safely escape them.
So I literally had to take a picture of the output, despite it being valid UTF-8 which displays in the browser perfectly fine. ↩
-
When re-using your Rails
secret_key_base, there is also special shorthand you can use forMessageVerifier-Rails.application.key_generatorandRails.application.message_verifier:x = Rails.application.message_verifier("cat").generate({name: "Barsik"}) # => "BAh7BjoJbmFtZUkiC0JhcnNpawY6BkVU--d9b8b0f4c814566e03c0e23a2cb1a8a9538f2357" Rails.application.message_verifier("cat").verify(x) # => {:name=>"Barsik"}