
Adding Elm to a Rails application
Introduction
Update: This tutorial was written before Rails 5.1 was released with integrated Webpack support, which makes this whole process much simpler. If you’re using Rails 5.1+, check out this tutorial instead.
Recently I added Elm to a Rails application using webpack, and it took me a while to figure out as I’m new to both so I figured I’d share what I did.
A complete example app is available on GitHub (abevoelker/rails-elm-example); this post will walk through each step used to create it.
Prerequisites
Before starting you should install these:
When finished, make sure these binaries are available and working: node, npm, elm, elm-package
A simple Rails app
Let’s create a simple Rails app with a static text greeting. We will later replace the static greeting using Elm.
Create a new Rails app, then add/modify the following files in the application:
-
app/controllers/welcomes_controller.rbclass WelcomesController < ApplicationController def index end end -
app/views/welcomes/index.html.erb<p>Hello from Rails!</p> -
config/routes.rbRails.application.routes.draw do root to: "welcomes#index" end
Now when you start the Rails server with rails s and point your browser to
http://localhost:3000, you should see the following
greeting:

Add webpack
Now we’re going to add webpack, which will make it easy for our Elm code to be dynamically compiled into JavaScript and included by our Rails app.
First add the webpack-rails gem to your Gemfile:
gem "webpack-rails"
Do a bundle install and then run bundle exec rails generate webpack_rails:install:
This will modify some existing files, and add some new ones:
-
Gemfile(modified)Foreman will be added to the Gemfile, which will be used to run the webpack dev server alongside the rails server in development mode.
-
Procfile(new)# Run Rails & Webpack concurrently # Example file from webpack-rails gem rails: bundle exec rails server webpack: ./node_modules/.bin/webpack-dev-server --config config/webpack.config.jsProcfile is used by foreman to define all processes it should run, in this case two processes: the Rails server and the webpack dev server. You start foreman using
bundle exec foreman start, and use it in place ofbundle exec rails sin development. -
package.json(new){ "name": "webpack-rails-example", "version": "0.0.1", "license": "MIT", "dependencies": { "stats-webpack-plugin": "^0.2.1", "webpack": "^1.9.11", "webpack-dev-server": "^1.9.0" } }package.json is npm’s project file, similar to a .gemspec file. Notably the
dependenciessection keeps track of npm packages required by the project. -
config/webpack.config.js(new)This is webpack’s configuration file. It’s a large file so I won’t reproduce it here.
-
.gitignore(modified)Two directories are added to .gitignore.
node_modulesis managed by npm and can be ignored.public/webpackis where compiled webpack assets will be stored. -
webpack/application.js(new)console.log("Hello world!");This is webpack’s default application entrypoint, although it can be changed by modifying
webpack.config.js. The default application just logs “Hello world!” to the browser console.
Add webpack entry point to Rails
Next, let’s modify the application’s layout to use webpacked JavaScript rather
than sprockets’s application.js. Remove this line from app/views/layouts/application.html.erb:
<%= javascript_include_tag 'application' %>
And now add the following line right above the closing </body> tag:
<%= javascript_include_tag *webpack_asset_paths("application") %>
We moved the JS include line so that when our JS loads, the HTML body is fully loaded and ready for JS to access/modify.1
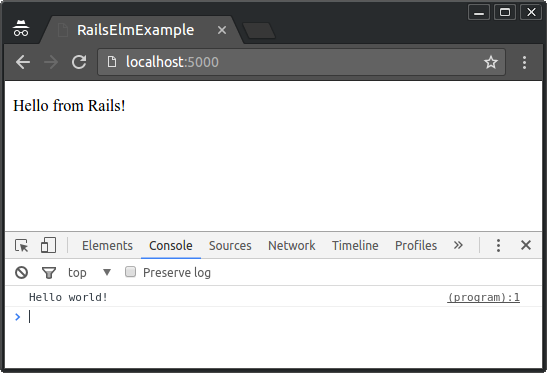
Now if you start the Rails app with bundle exec foreman s and point your
browser to http://localhost:5000 (note foreman starts
Rails on port 5000 rather than 3000), you should see the default webpack
application “Hello world!” in the developer console:
If you take a look at the HTML source being rendered, you’ll see that the JS is actually being served from a different webserver than Rails (this is the webpack-dev-server):
<!DOCTYPE html>
<html>
  <head>
    <title>RailsElmExample</title>
    <meta name="csrf-param" content="authenticity_token" />
<meta name="csrf-token" content="cbNbYslowkMUrKD9BY2xR1upbV+ctSAfI9t0LDDpZHIcw0K303NjnPcFd5eD8Kz+YRu9l9QNnWrB39esvxyaZg==" />

    <link rel="stylesheet" media="all" href="/assets/application.self-af04b226fd7202dfc532ce7aedb95a0128277937e90d3b3a3d35e1cce9e16886.css?body=1" data-turbolinks-track="reload" />
  </head>

  <body>
    <p>Hello from Rails!</p>

    <script src="http://localhost:3808/webpack/application.js"></script>
  </body>
</html>
Install Elm npm packages
Now we’re ready to start adding some Elm dependencies. First, use this command to install needed Elm npm packages:
$ npm install --save elm elm-hot-loader elm-webpack-loader
This will modify your package.json dependencies.
Install Elm packages
Now we’ll need to install the default Elm packages:
$ elm-package install
This will ask you to install elm-lang/core, elm-lang/html,
elm-lang/virtual-dom, and will create a new elm-package.json file and a
elm-stuff/ directory in the root of the project. elm-stuff can be added to
.gitignore as it is managed by Elm.
Tell webpack how to handle Elm
Next we need to modify the webpack config to tell it to recognize .elm files and
how to compile them. Open config/webpack.config.js and add this section to the
inside of the config object:
module: {
  loaders: [{
    test: /\.elm$/,
    exclude: [/elm-stuff/, /node_modules/],
    loader: 'elm-hot!elm-webpack?verbose=true&warn=true'
  }]
},
Add Elm to Rails app
Now it’s time to add some Elm to our Rails app. There are two main ways to
render HTML using Elm; one is
letting Elm control the entire page <body> (referred to as fullscreen), and
the other is letting Elm control a specific HTML node (referred to as embed).
We are going to use the embed method to give Elm control of only a part of our
page, which will probably be the typical approach for most legacy Rails apps
wanting to add Elm.
First, let’s add a <div> to our welcome page which Elm will take control of.
Modify app/views/welcomes/index.html.erb as follows to add a div:
<p>Hello from Rails!</p>
<div id="main"></div>
Elm component
Now we’re finally ready to add actual Elm code to the Rails app. We are going to store our Elm
components in a new subdirectory, webpack/elm/, so first create that directory.
We will now create a single Elm component, Main.elm, stored as
webpack/elm/Main.elm. Create that file with the following content:
import Html exposing (text)

main =
  text "Hello from Elm!"
Finally we must modify webpack/application.js to load this component and
embed it in our target HTML div node:
// inject bundled Elm app into div#main
var Elm = require('./elm/Main.elm');
Elm.Main.embed( document.getElementById( 'main' ) );
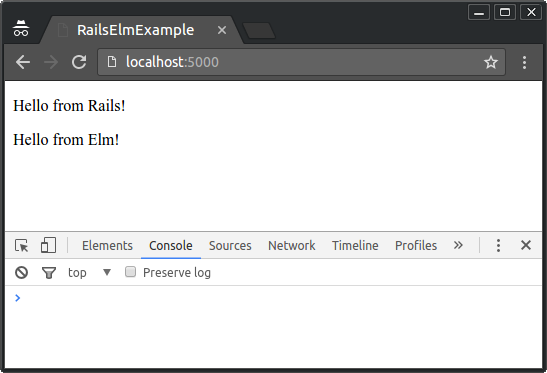
Now if you reload http://localhost:5000 you should see the following output:
Wrap-up
That’s all there is to it. Note that I haven’t tested this in a production
deploy, but I believe it should still work. webpack-rails should compile
output to public/webpack and the webpack_asset_paths view helper should
know to look there.
Also, there’s obviously a lot more advanced things you can do with Elm than “hello world”. You should check out the Elm Guide to get a tour of what’s possible!
Footnotes
1 If you later start using webpack to manage your CSS in addition to your JS, you’ll have to slightly modify this line.